Over the past year, many businesses in New Zealand, including hair salons, barber shops, and nail boutiques, have gradually resumed operations. To guarantee everyone’s safety close-contact services such as hairdressers, barbers, and beauticians can utilise these physical barriers to safeguard their clients and employees from the spread of germs and the virus.
How do perspex screens work?
Perspex screens go by many names like cough guards, hygiene screens, sneeze guards, and more. But they all represent the same idea – creating a physical barrier between people to limit the exposure to germs and viruses.
In salons they can be used to partition sections of the shop floor and help maintain social distancing.
Here are a few areas you could use the cough guards for:
In waiting areas, to separate customers waiting at the same time
Reception areas and any counters in general
Between styling chairs or hairdresser sinks, to place a barrier between customers
On manicure tables, to separate the nail technician from the customer.
Cough screen designs for hair salons and barber shops
1.Freestanding partitioning screen
This design will help you minimise the interaction between customers who find themselves in the salon at the same time, either in the waiting areas or using the styling chair and sinks. Completely freestanding, the structure uses transparent plexiglass panels that will not obstruct any light coming into the area.
The separation screen can also be moved from one area to the other as it is not fixed to the floor.
Specs:
Height:2m
Length: 2m
Depth: 0.6m
Parts you’ll need
Size 6 (33.7mm O/D) Galvanised Tube
61-6 – Flange, 33.7mm O/D
M50-6 – Male Single Swivel Socket Member, 25mm
21-6 – 90° Side Outlet Tee, 25mm
15-6 – 90° Elbow, 25mm
M51-6 – Male Double Swivel Socket Member, 25mm
2. Freestanding barrier screen for the reception area
This sneeze guard can be placed over the reception desk. The mid bar can be positioned either higher up or lower down the frame to accommodate the height of your counter.
Similar to our full height partitioning screen, this design can be moved around the salon as it does not require any fixing onto the ground.
Specs:
Height:2m
Length: 3m
Depth: 1m
Parts you’ll need
Size 6 (33.7mm O/D) Galvanised Tube
77-6 – Plastic Plug, 25mm
75-6 – Collar, 25mm
M50-6 – Male Single Swivel Socket Member, 25mm
15-6 – 90° Elbow, 25mm
10-6 – Single Socket Tee, 25mm
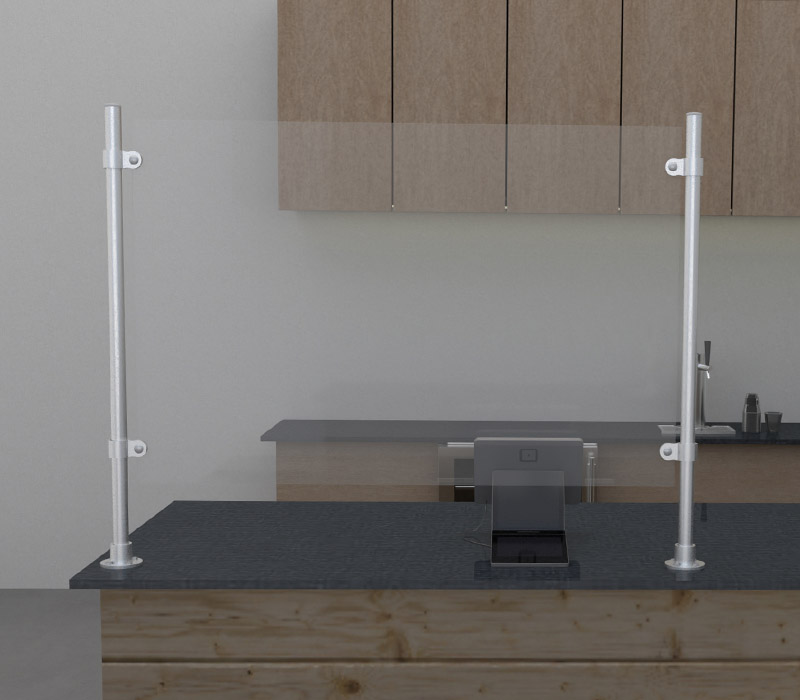
3. Fixed countertop sneeze guards
Well suited for the reception area in any salon or barbershop, this sneeze guard fixes itself onto the surface using heavy duty flanges.
Specs:
Height: 1m
Parts you’ll need
Size 6 (33.7mm O/D) Galvanised Tube
77-6 – Plastic Plug, 25mm
61-6 – Flange, 33.7mm O/D
75-6 – Collar, 25mm
M50-6 – Male Single Swivel Socket Member, 25mm
Cough screens for nail salons
4. Simple nail salon shield
This design uses two uprights and a transparent protective shield that has cut-outs for your hands. This is a fixed option that used flanges to attach to the surface.
Specs:
Height: 1m
Width: 0.8m
Parts you’ll need
Size 6 (33.7mm O/D) Galvanised Tube
M50-6 – Male Single Swivel Socket Member, 25mm
61-6 – Flange, 33.7mm O/D
15-6 – Plastic Plug, 25mm
77-6 – Plastic Plug, 25mm
5. Enclosed cough shield
For additional protection, this design uses uprights to spread the plexiglass screens to the sides as well.
Specs:
Height: 1m
Parts you’ll need
Size 6 (33.7mm O/D) Galvanised Tube
M50-6 – Male Single Swivel Socket Member, 25mm
M51-6 – Male Double Swivel Socket Member, 25mm
77-6 – Plastic Plug, 25mm
61-6 – Flange, 33.7mm O/D
M52-6 – Male Corner Swivel Socket Member, 25mm
6. Nail salon safety divider – H frame
This divider design will help create a protective barrier between nail technicians and their customers, but also between customers who find themselves in the vicinity of others. The mid bar for this frame can be placed up or down the frame to suit the height of your tables or counter.
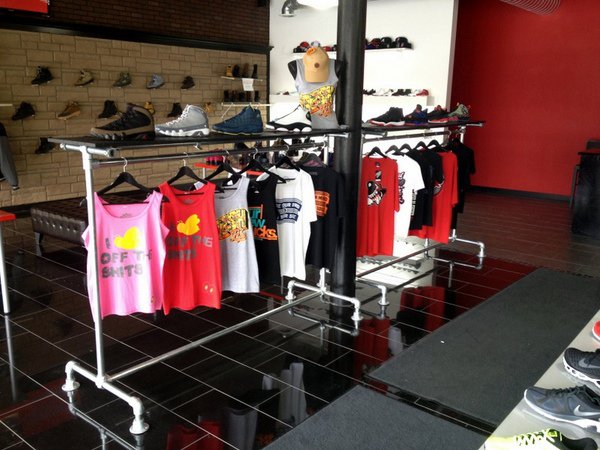
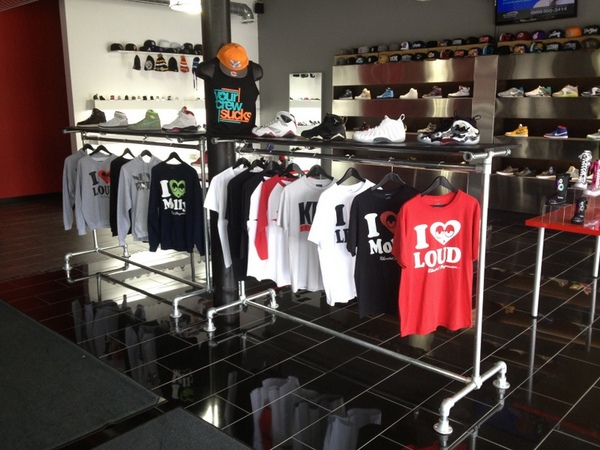
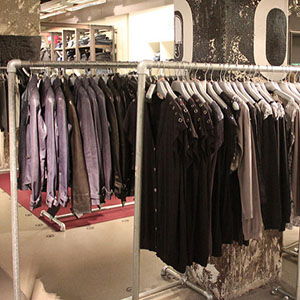
When Laced up, an urban footwear and clothing store was looking for some custom rails to be placed in centre stage of the store, they decided that our Kee Klamp clothing rails fit the bill, with their modern décor and industrial look, the Kee Klamp clothing rails compliment the existing tables and racking while providing a functional yet stylish centrepiece.
Using a standard design of clothing rail, it was adapted slightly using an extra tee fitting and tube, a shelf was then added using 70’s.
The Beauty of using KeeKlamp fittings is its infinite versatility, existing structures can be added onto or redesigned to suit whatever design is required, its huge range has a fitting for nearly any function.
If you are interested in creating your own custom Clothing rail, contact us and see how we can help.
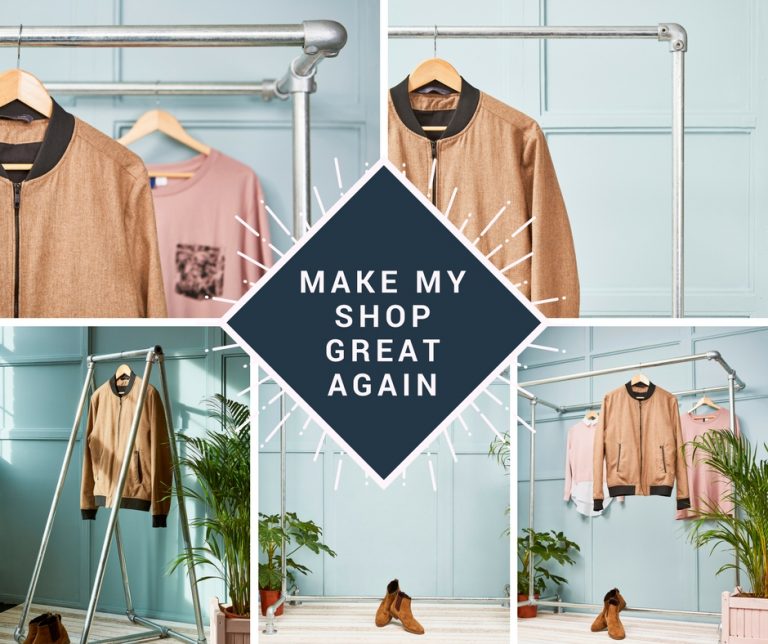
This unit caught our attention recently: this simple design is very effective and the aged tube and fittings really stand out, so we took the challenge to come up with an idea for something similar.
Retail furniture comes in many shapes and sizes and can either complement your products or, if poorly chosen, completely work against your brand. You need to create a good balance between storing your merchandise efficiently, displaying it in an enticing way and leading shoppers around your store.
Types of clothes rails
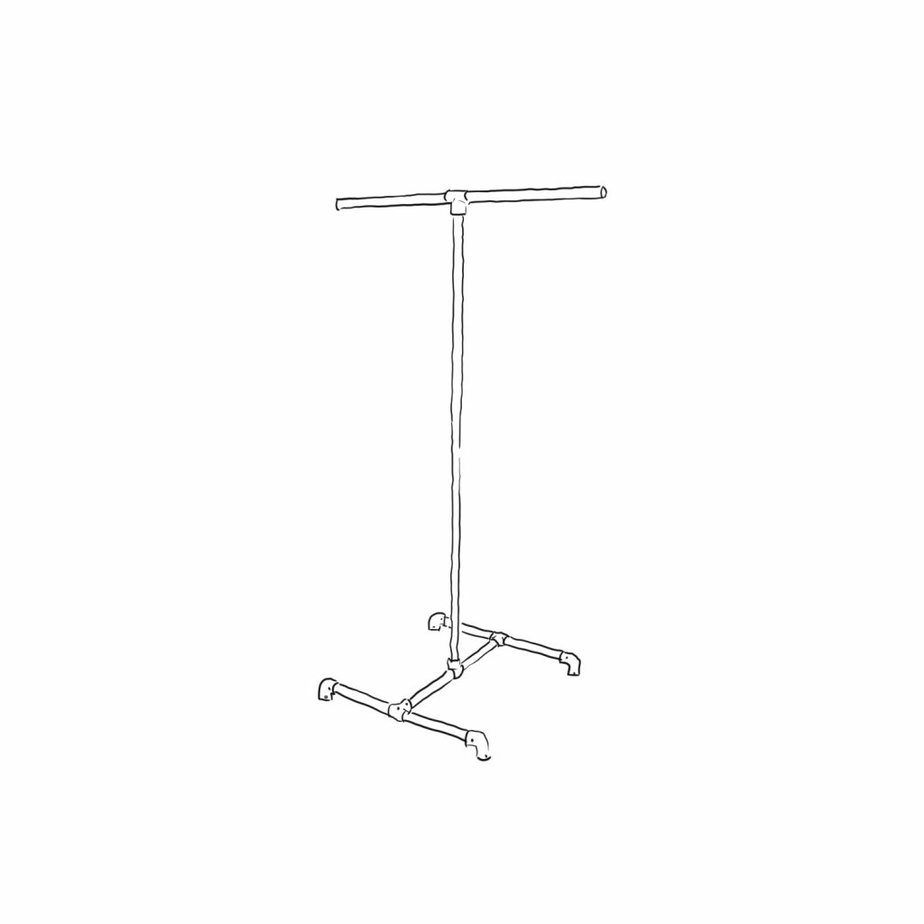
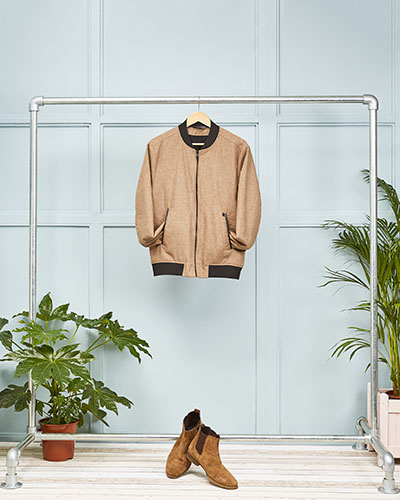
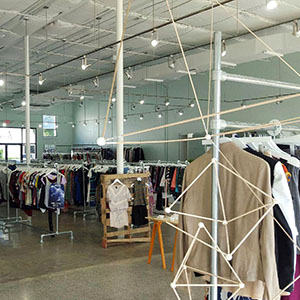
1. Free standing garment rail
Free standing clothes rails are ideal for either wide space shops or pop-up stores where a display system needs to be quickly put together and taken apart. They are also suitable for spaces where walls cannot be used, such as some rented areas or exhibitions and fairs.
Examples:
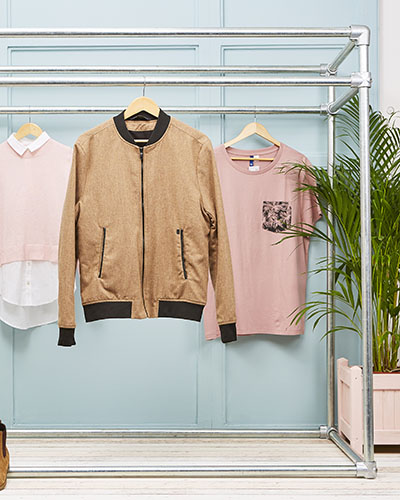
Freestanding display clothing rail
Wide freestanding clothing rail
Kee Klamp clothes rails are easy to put together (you only need an Allen key) and can be reconfigured to fit any space.
Adding a set of casters to the rack will help you move it around the shop as needed.
More examples of freestanding clothing rails:
Simplest to put together: Free standing clothing rail (single)
Perfect for exhibitions or warehouses: Display clothing rail
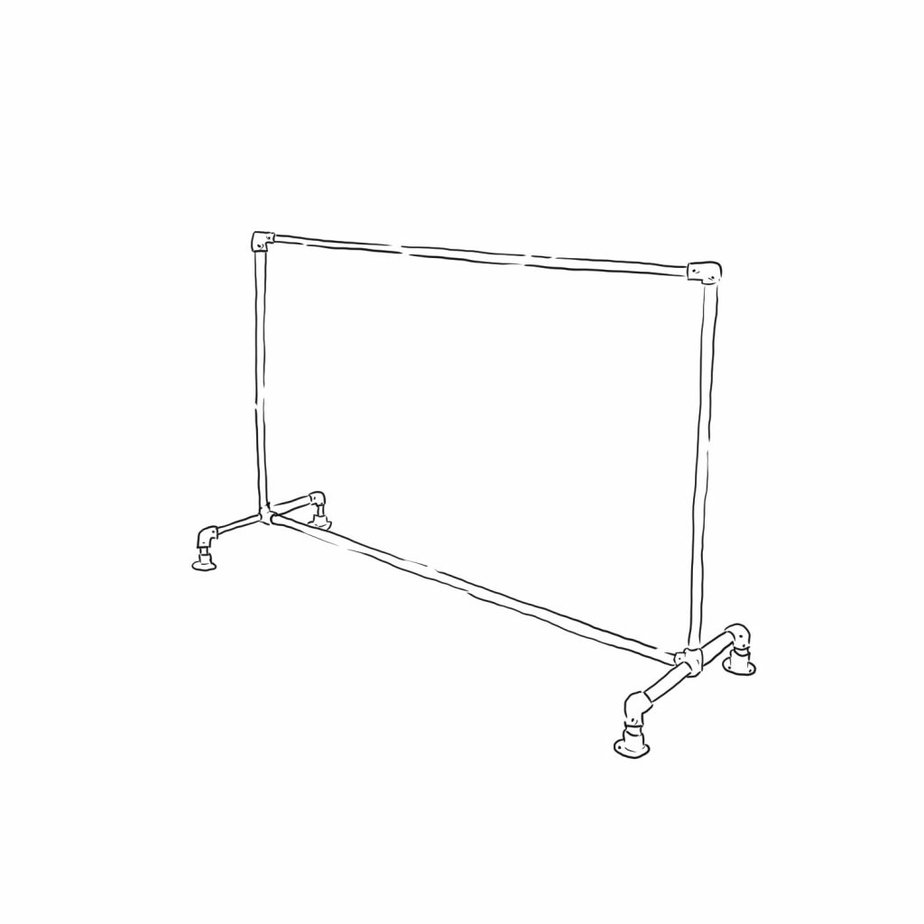
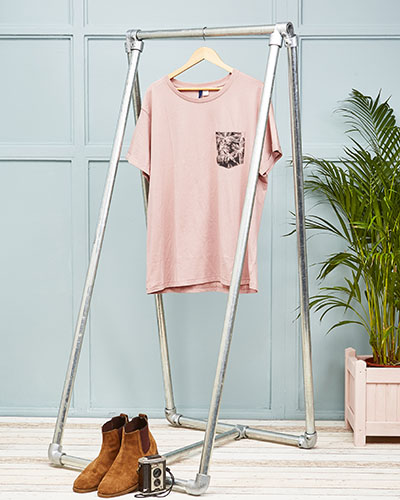
Great for ‘that’ statement piece of clothing: A-frame clothing rail
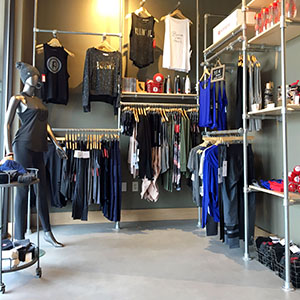
2. Wall mounted clothing rails
If you struggle for space and can use the walls in your shop, choose a wall mounted display system. You can build a lot of storage space vertically, making sure that you use the available space in a smart way.
Examples of wall-mounted clothing rails:
Under shelf clothing rail
Wall mounted clothing rail
When fixing the clothing rail, make sure that the wall is strong enough to hold both the rail and your garments. A good solution would be a hybrid rail, which is fixed on both a wall and the floor.
Examples of wall & floor mounted rails:
Wall-mounted rails with arms
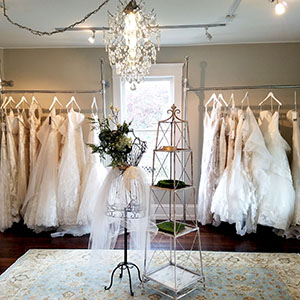
Wall to floor rails for long dresses
Wall to floor clothing rail system
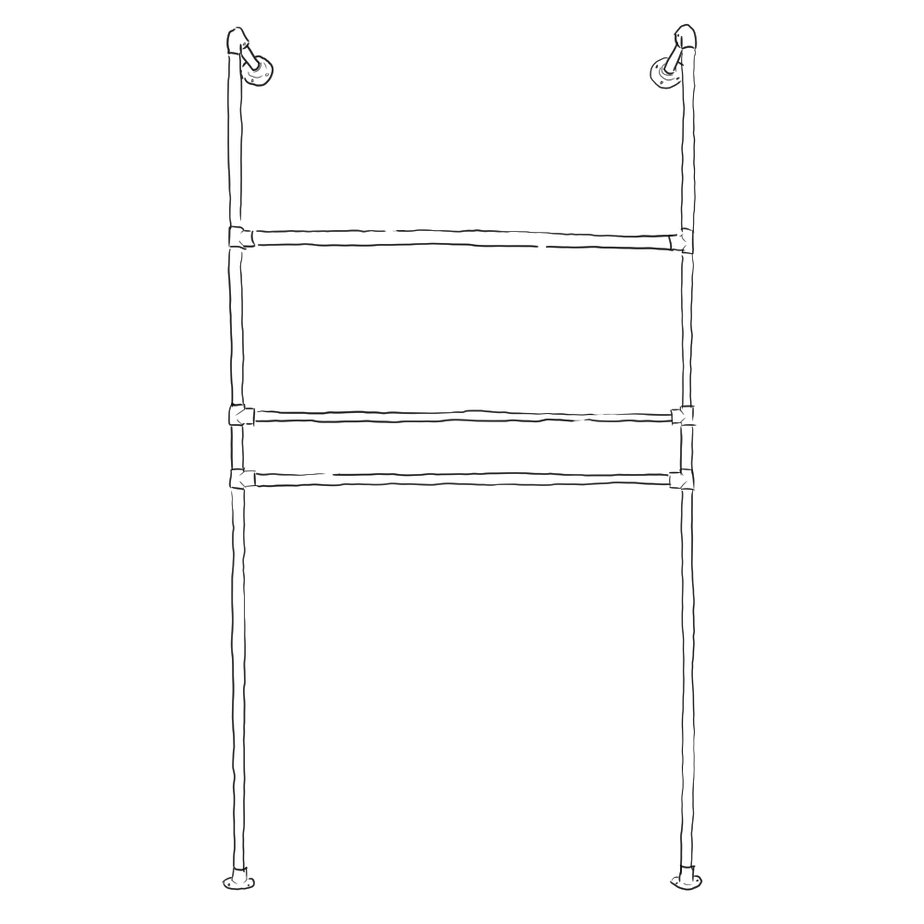
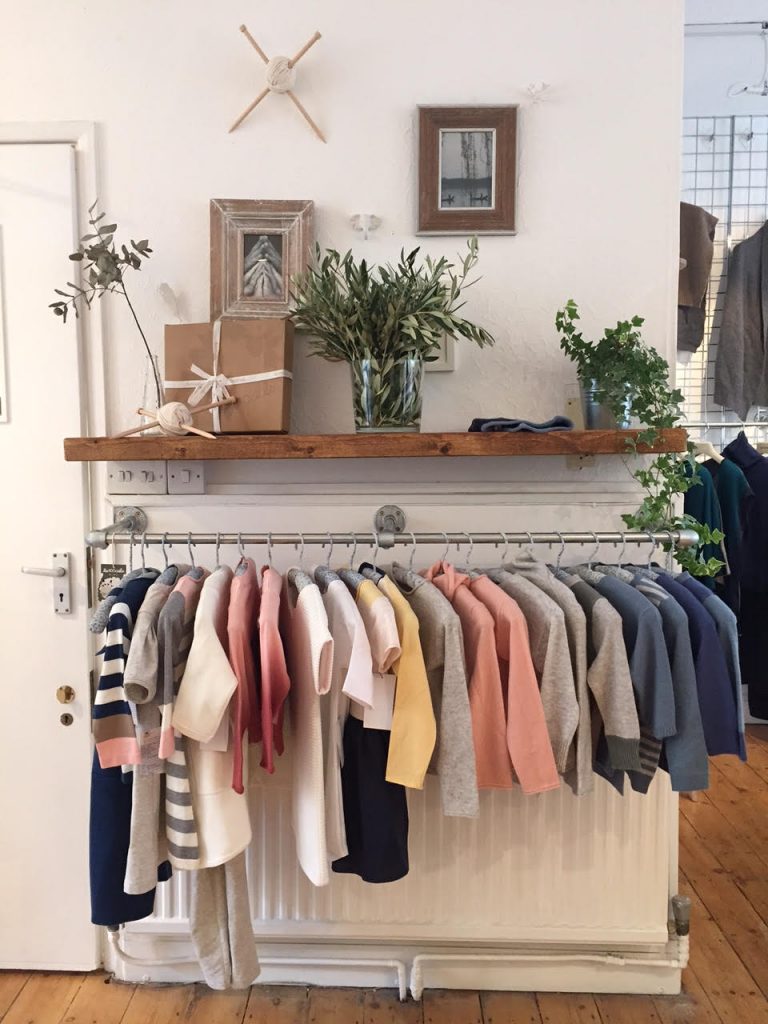
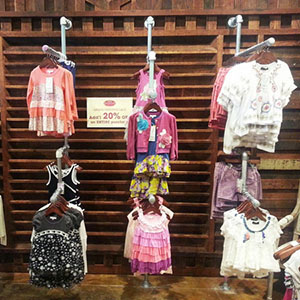
To use the space around a radiator, build a handrail style clothing rail, just like Neo Conceptsdid for their range of children’s wear:
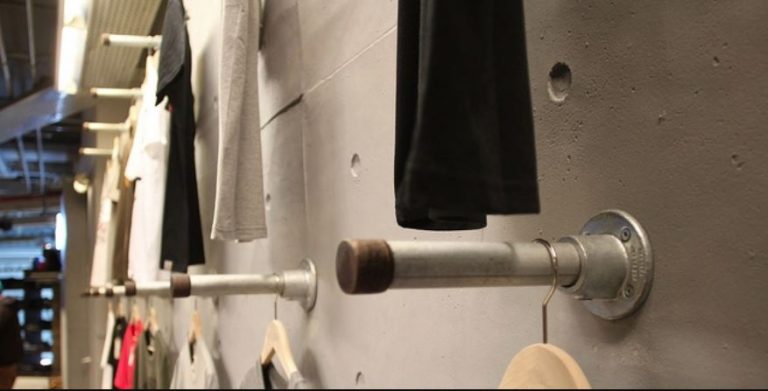
3. Clothing hooks
Clothing hooks are some of the simplest storage solutions to build and can be a great display system for your products. Use these throughout your store and in the changing rooms.
Use a piece of longer tube to display several T-shirts, or a shorter piece of tube for fewer garments.
Example:
To achieve a very laid back industrial look for your shop you can even build a butcher style clothes rack with hooks.
Heavy duty clothing rails
Made of galvanised steel, Kee Klamp clothing rails are industrial strength structures that will hold a lot of clothes without the slightest bend. Shop owners have used Kee Klamp structures to store and display all sort of items, from delicate clothing to heavy duty barrels and tyres.
Our Kee Klamp clothing rails can even hold the weight of a person doing pull-ups!
A wall mounted coat rack is a great choice for any hallway. They are sturdy, easy to install and can hold a lot of garments. In this post, we want to show you how you can build an industrial style coat hanger that also features a shelf you can use for your hats. Let’s get started!
The following parts will help you build a wall-mounted rack with the following dimensions:
Width: 1 m
Height: 30 cm
Depth: 30 cm
IMPORTANT! Before you start building this structure, please make sure that your wall is strong enough to hold the coat rack. The rack is made of galvanised steel and is not the lightest clothing rack out there. Adding the shelf top, clothes and hats will increase its weight, so make sure that your wall can take all the weight.
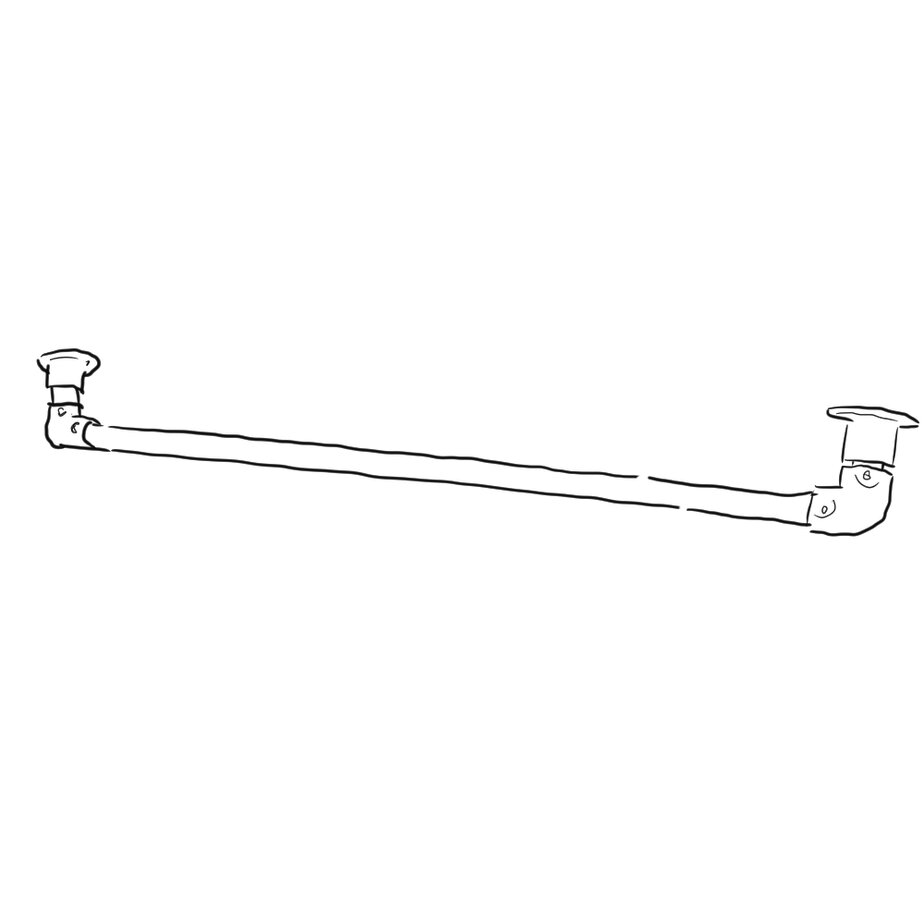
Take all 4 hooks (76-6) and slide them onto your 1 m pole. Make sure you leave enough space at each end of the pole for the 20-6 fittings (see Step 2).
Place the hooks at equal distance from each other.
Here’s what you need to build a similar structure:
Step 2: Attach the two outlet elbows to your 1m pole
Take 2 side outlet elbows (20-6) and attach them to each end of the tube.
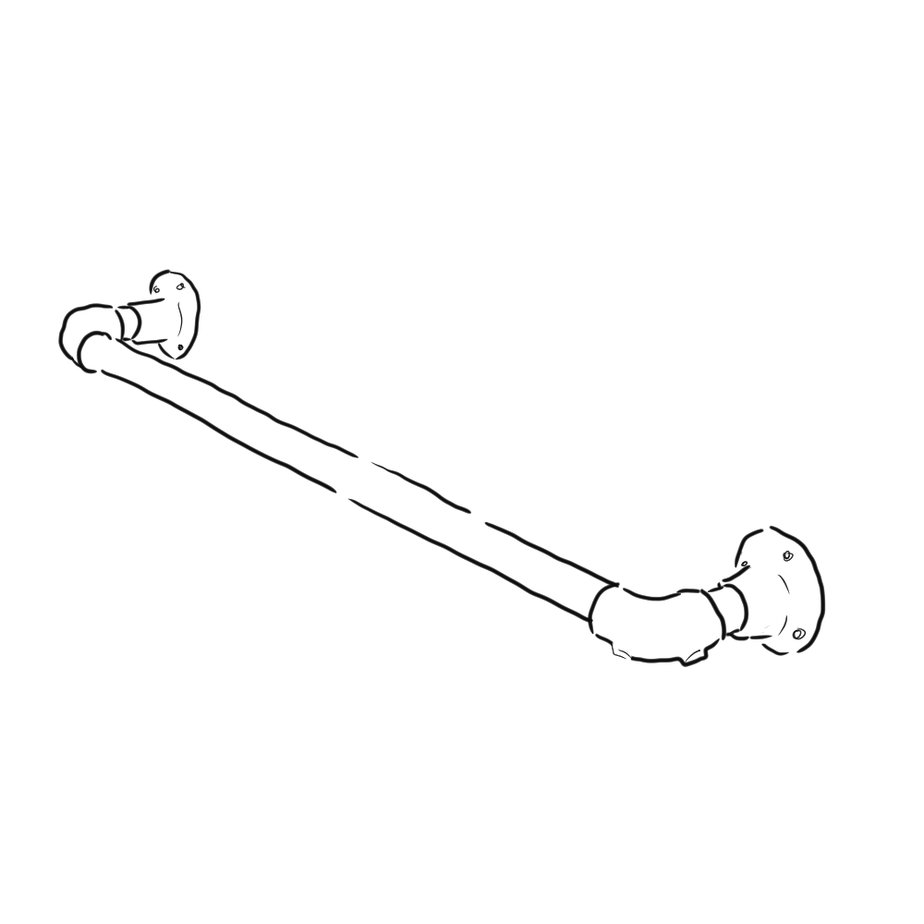
Step 3: Connect 2 x 30 cm tube to the elbows
Take 2 x 30 cm tube and attach each of them to the 20-6 fittings.
Step 4: Add the uprights
Take 2 x 30 cm pieces of tube and attach each of them onto a 20-6 fitting, as shown below.
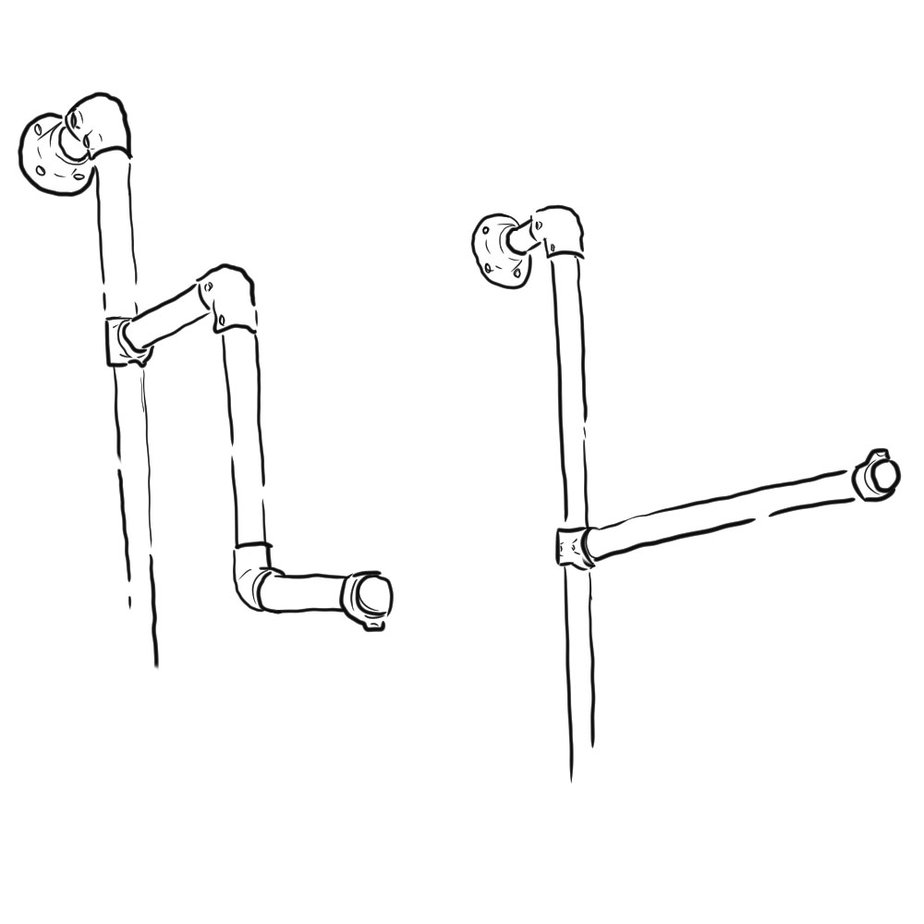
Step 5: Add the 90 degree elbows to the uprights
Take 2 x 90 degree elbows (15-6) and attach each of them to the 30 cm uprights.
Step 6: Build the shelf support
Take the 2 remaining 15 cm poles. Then take 4 x M50-6 and slide two of them on each pole, fixing them at an equal distance from each other.
The M50-6 fittings will act as a support for your chosen shelf top:
Step 7: Connect the shelf support to the rest of the structure
Attach the tube in Step 6 to the rest of the structure, by connecting it to the 90 degree elbows (15-6).
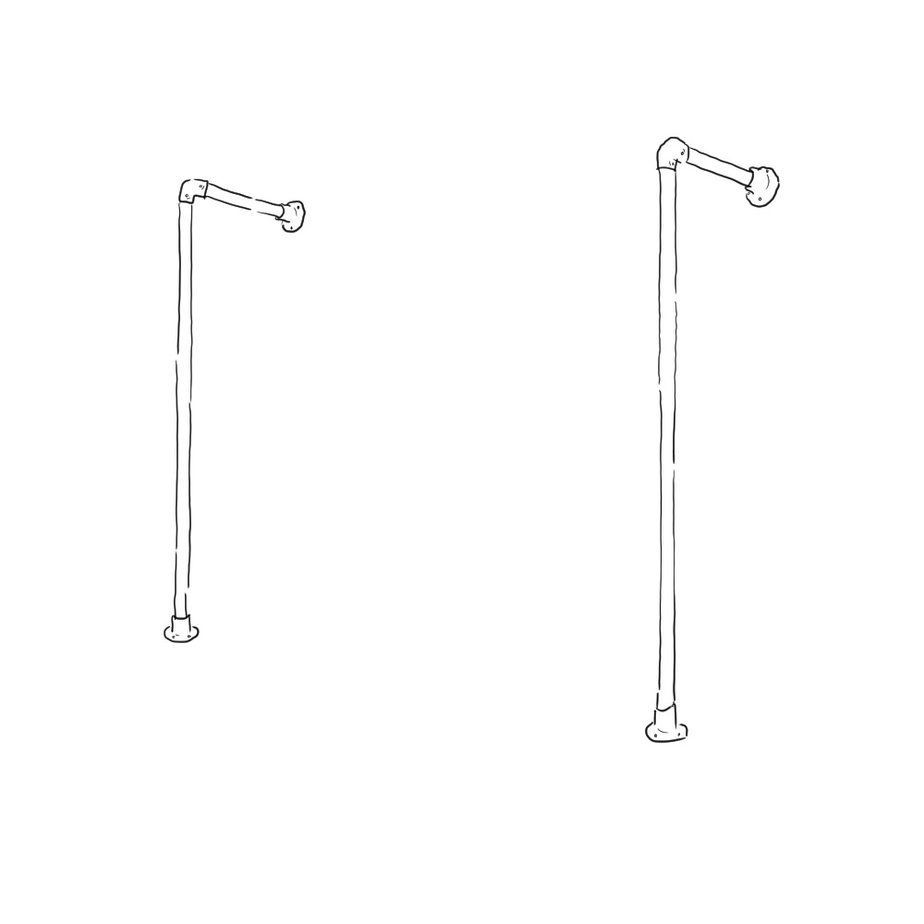
Your structure should now look something like this:
Step 8: Add the flanges
Add the 4 flanges (61-6) to each end of your structure. These will help you mount the rack to the wall.
Step 9: Add your preferred shelf top
Add your preferred shelf top. Wooden tops are a very popular choice:
Step 10: Fix the structure onto your wall
Fix the structure onto your wall using suitable fixings. You can find these in your local DIY store.
If you want to build your dining table, why not go for Kee Klamp fittings? Here are 10 ideas for industrial dining tables that may inspire you to make one for your home.
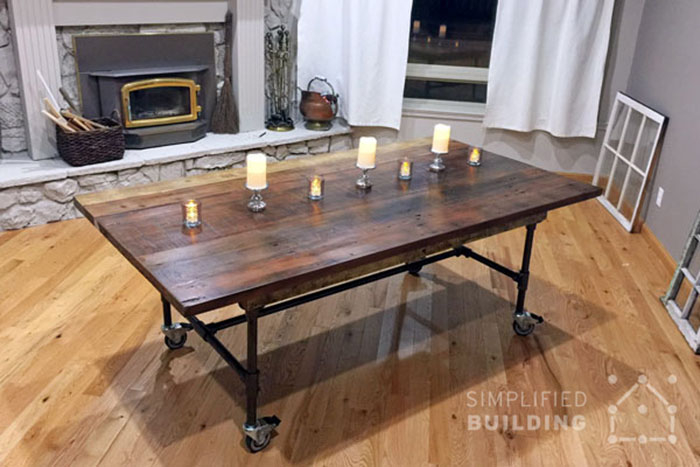
1. Rustic dining table
This dining table features a reclaimed wood custom top and a Kee Klamp frame which was painted black to match the décor of the room. The Standard Table Frame was set on braked castors to allow the structure to be easily moved around.
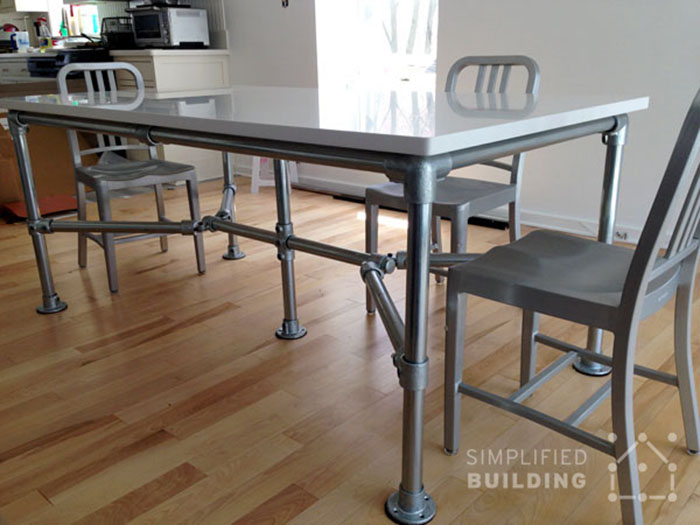
2. Quartz top family table
Kee Klamp fittings can be integrated within an elegant setting: just take example from this family who paired the galvanised steel table frame with a quartz top. This specific table top needed a strong frame to hold the weight of the top.
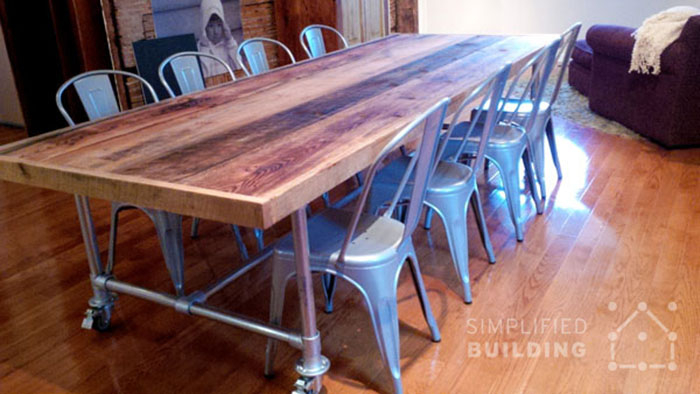
3. 3m long dining table
This long dining table can easily sit 10 people and would be perfect for large families or entertaining guests.
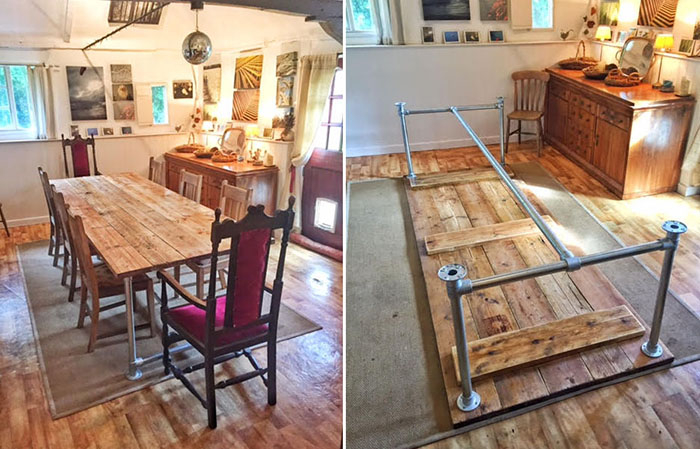
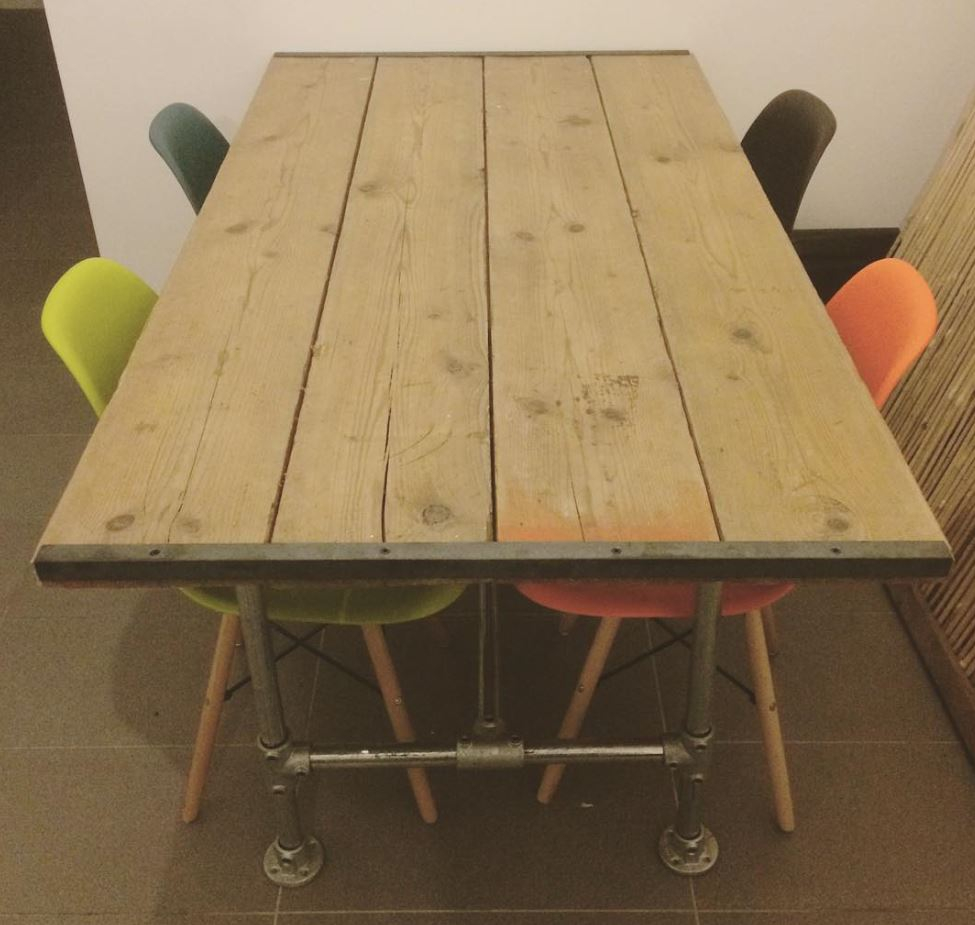
4.Reclaimed wood dining table
Kai built this rustic dining table using Kee Klamp and added a reclaimed wood tabletop. He found it very easy to put together and is very happy with how it turned out.
5. Merging tables
Ryan built two smaller tables and added two similar tabletops to the frames. The idea was to either use the smaller tables separately (for children’s homework for example) or merge them to create a family-sized dining table when needed.
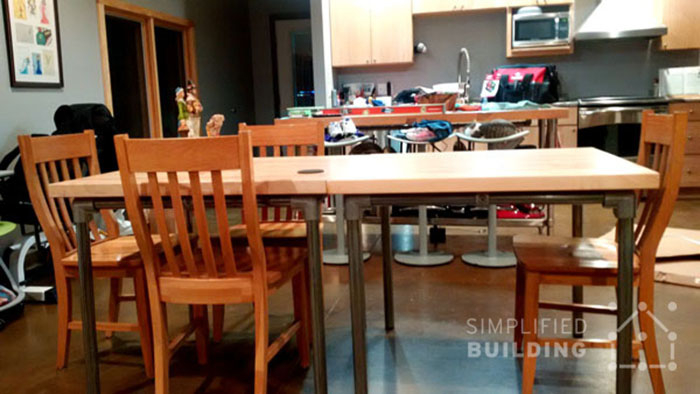
6. Easy DIY dining table
Dan built this industrial dining table using Kee Klamp and reclaimed wood. The two metal sides give this table a unique look. He paired it with a set of colourful chairs for a modern twist.
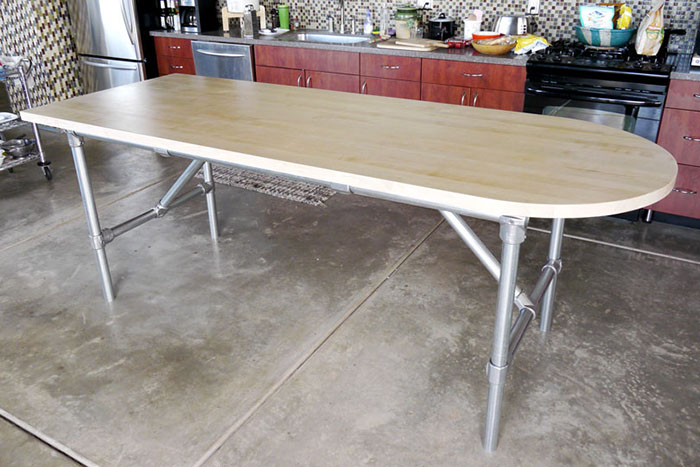
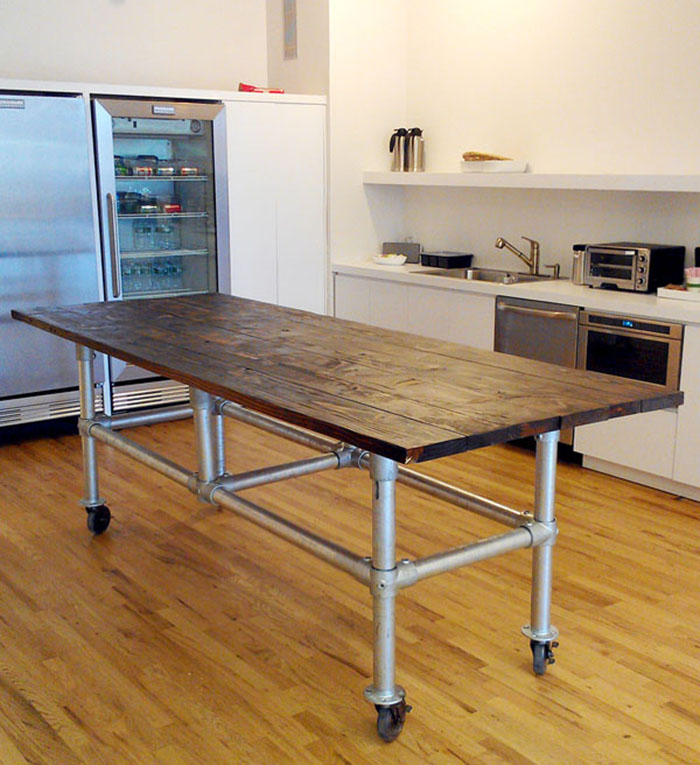
7. Kitchen island and dinner table
Customer name Eric built this large kitchen work table using aluminium fittings. This table is light and durable and can be used as a kitchen island or a dinner table.
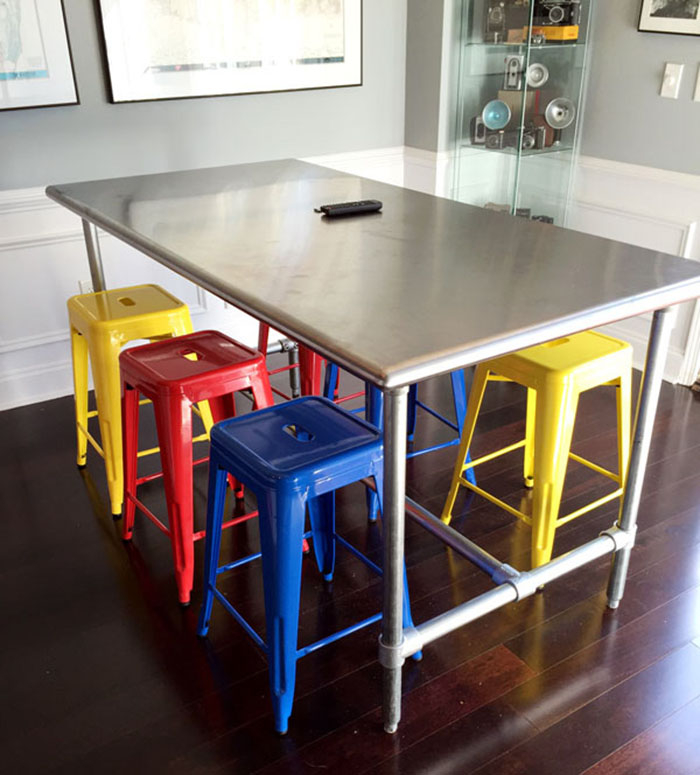
8. A cool dining area
Jeff built this kitchen table to serve as a food prep area and as a dining table too. Paired with the colourful stools, this makes for a cool area to entertain friends and family.
9. A sturdy dining table frame
Michael has added a custom table top to this rolling table frame; this would give the structure a rustic appeal. Because of the table weight, Michael decided to add castors and make it easier to move around. This table would easily sit 10 people.
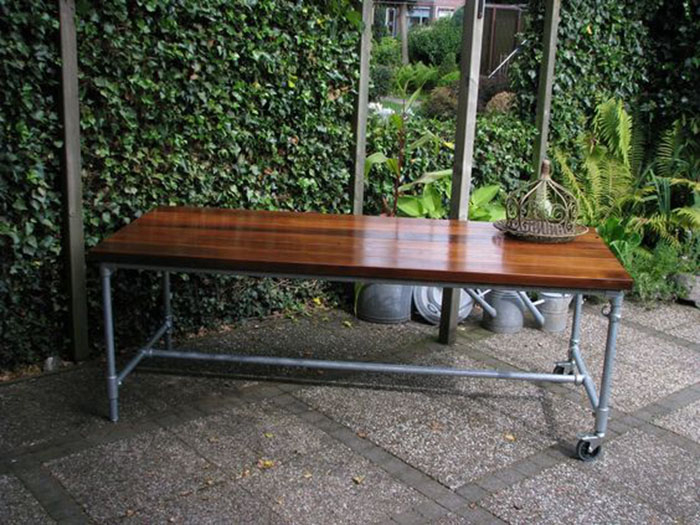
10. Outdoor dining
Why not dine outside? This table was built to be used both indoors and outdoors. Galvanised steel is corrosion resistant and can be left outside permanently. This material is even used to build very sturdy roof barriers and will withstand harsh weather.
Pair it with a sleek, shiny table top to obtain a modern, sophisticated look. Add castors to easily move it from the inside to the outside.
Why Kee Klamp?
Resistant – Kee Klamp fittings are hot dipped galvanised and incredibly resistant to rust, so you can safely use them for outdoor structures. Customers have used these to build handrails on docks for example.
No welding – Kee Klamp fittings do not require any welding, which means that they can be used by anyone, including domestic customers, for a variety of projects. All you need is an allen key!
Kee Klamp fittings are great for building sturdy structures that will stand the test of time. We’ve shown you how you can use these to construct furniture, greenhouses and plenty of other unusual structures; today, we will go through some examples of outdoor handrails that our customers have built for their homes or gardens.
1. Outdoor stair railing
These two handrails were installed by Bruce on the main entry stairs. Bruce painted them black so that they match the colour scheme of his house.
2. Metal handrail with curves
This handrail was constructed without the need to bend the metal tube. David used Obtuse Angle Elbows (55 type fittings)to create the curves in this handrail.
If you are looking for a similar outdoor handrail system, you will need the following fittings:
Mark decided to use Kee Klamp and tube to create this sturdy handrail for his roof terrace. This now provides an increased level of safety to the terrace, making it a perfect place to spend time with family and friends.
To make it extra safe, you can add infill panels to prevent children from climbing on the handrail.
Here’s what you need to build a similar structure:
One of the customers used Kee Klamp to create a handrail for the pool area. The handrail will provide a good level of safety on a slippery surface such as this one.
Here are Kee Klamp fittings you will need to build a similar handrail:
Bob was looking for a cheap handrail option that would suit the winding stairs in his garden and the stone wall that surrounds these.
Adding railing to a stone wall can be difficult, but the key is to use the right anchors. Options include concrete screws, expanding anchors and sleeve anchors
Build a sturdy handrail for your balcony and use glass panel inserts; this will maximise a beautiful view. Although harder to clean, the glass inserts will give your balcony a modern, elegant look.
Here’s what one of the customers has built using Kee Klamp fittings:
He used P50 fittings to attach the glass panels to the structure.
7. Outdoor handrail system that is mounted to the ground and one wall
This handrail was built by Jacob and it is fixed on both the ground and one wall of the house.
Here are Kee Klamp fittings you would need to build a similar handrail:
David needed a custom solution to cover the front stairs and the porch of his home. He did not want to sacrifice style, so he painted the galvanised fittings and tubes with textured brown paint.
9. Stair handrail for a house with a beach view
Patrick’s house has a view of Lake Michigan in the US and access to the beach. However, the stairs leading to the beach needed a sturdy handrail that was easy to install and would be super durable.
Patrick’s house has a view of Lake Michigan in the US and access to the beach. However, the stairs leading to the beach needed a sturdy handrail that was easy to install and would be super durable.
Mike needed a handrail for his mother’s front steps. He wanted to encourage her to move around more and go out of the house, but his mother found it difficult to navigate steps in general.
Why Kee Klamp?
Resistant – Kee Klamp fittings are hot dipped galvanised and incredibly resistant to rust, so you can safely use them for outdoor structures. Customers have used these to build handrails on docks for example.
No welding – Kee Klamp fittings do not require any welding, which means that they can be used by anyone, including domestic customers, for a variety of projects. All you need is an allen key!
Whether you’re a keen gardener or you’re just starting out, you might be thinking of building the perfect staging for your greenhouse. Shelves, benches and tables for greenhouses can sometimes be hard to source, especially when you are working with awkward or small spaces. If this is the case, then going bespoke will probably be the only option.
In this article, we show you how Steve from Warwick built his own greenhouse multi-tiered units using Kee Klamp, tube and scaffolding planks.
Why Kee Klamp for a greenhouse?
It’s resistant to rust and damp
Its industrial-strength means that it will hold very big weights
It’s modular, easy to put together and dismantle
Can be used in just about any configuration
It’s made of galvanised steel, a no-fuss material that is easy to maintain and clean should you need to.
Greenhouse shelving to suit any space
Steve used size 6 Kee Klamp fittings and tube to build a multi-tiered unit for his small greenhouse in Warwick. He needed to maximise all the space he had available.
Steve used M50 fittings to support the shelves; using these will give your structure a recessed look.
“The standard shelving kits you buy from a garden centre never fit properly into the space you have, hold a minimal amount of weight as they tend to be plastic and waste space; so Kee Klamp offered the best solution as I designed it to use all of the space available. Some minor modifications were made with the tube which required a basic hacksaw and that was it. My children have even sat on the shelves which demonstrates its stability and clearly shows the strength of the shelving”.
Where to start
Start by measuring the space you’ve got available and come up with a suitable structure. Once you’ve got a sketch of the structure (together with the dimensions) you can either start putting together a list of the fittings and tube you require or you can send the sketch to us for a quote.
You will find that working with Kee Klamp is super easy – all you need to put the system together is an Allen key! You don’t need any welding or specialist tools to work with the system.
Can Kee Klamp be used outdoors?
Yes! Galvanised steel fittings and tubes are perfect for building any kind of structure for your garden: tables, benches, awnings and more.
Design company Grain & Mortar were looking to outfit their studio with new custom desks that would match the industrial space they had available. The company wanted to use the desks both while sitting and standing, therefore decided to go for a high-rise aluminium frame which they combined with wooden sections constructed by a local woodworker.
These table frames use Kee Lite aluminium fittings and tube that can be put together in less than 30 minutes with just an impact driver. The frames are lightweight, have an industrial feel but give a more polished look than our galvanised steel desk frames.
Kristin from Grain & Mortar had this to say about the desks they built:
If you are short on space, then this simple desk could be the right choice for you. You can build a similar desk using just some tube, fittings and a table top that you can source from your local wood recycling centre.
Tube and fittings are versatile and DIY-friendly systems that will help you build a desk for any area in the house, even if that area is under your staircase.
The table frames used have a similar design to our Rugged table frame (which is made of galvanised steel).
Marlee confessed that she now loves working at her new desk every day. This unit was built by her husband using tube and fittings and it provides both a good-sized area for her laptop and files, as well as plenty of storage space to help her keep organised.
If you are short on space, then this simple desk could be the right choice for you. You can build a similar desk using just some tube, fittings and a table top that you can source from your local wood recycling centre.
Tube and fittings are versatile and DIY-friendly systems that will help you build a desk for any area in the house, even if that area is under your staircase.
Combine an unpretentious table top with tube or pipe to recreate this vintage, functional crafts desk. Paint the pipe and fittings black to give it more character.
A while ago, Atlanta Homesfeatured this office space created by designer Jimmy Stanton for a country residence. Jimmy’s purpose was to make it look “traditional without being stuffy”. The bespoke desk allows plenty of room for two people to use it at the same time.
Jayme used pipe and a carved wooden table top to create an elegant office space for her home. She kept the entire colour scheme neutral and the result was this calming area that was widely praised among her friends.


