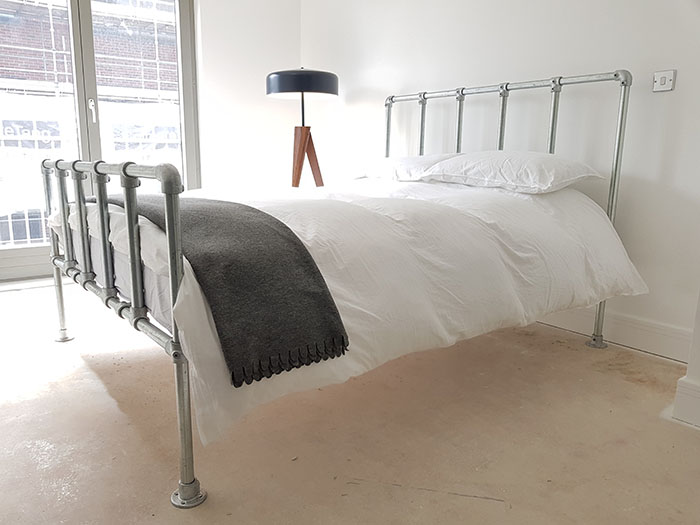
DIY Camden bed frame is easy to put together, super sturdy and looks fantastic. Two people are required to build this one, and it can be done using just an Allen key.
Materials: Galvanised steel tube and Kee Klamp fittings
Finish: Galvanised steel (not coloured)
A king size bed you can put together in less than an hour.
Like the idea of an industrial look for your bedroom? This DIY bed frame is a great way to achieve a minimalist and industrial look!
King size bed dimensions:
Length: 200 cm
Width: 150 cm
Headboard height: 120 cm
Footboard height: 80 cm
For this project you’ll need
Kee Klamp fittings, in size 6, made of galvanised steel
Galvanised steel tube, in size 6
Bed slats (need to be purchased separately)
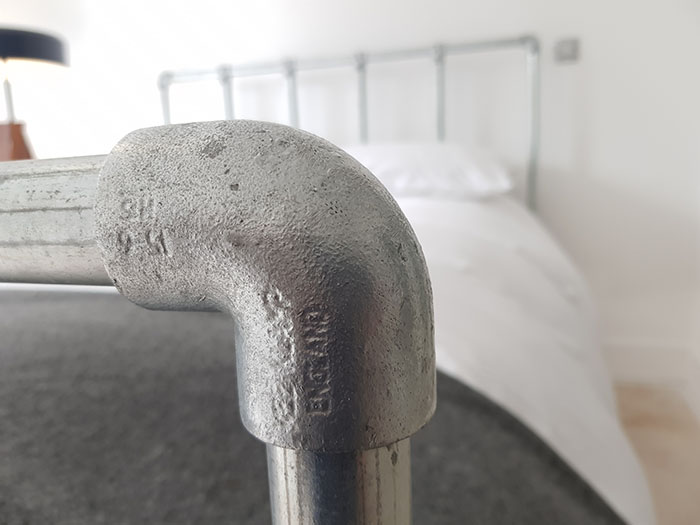
Start assembling the footboard first, using 10-6 and 15-6 fittings to connect the tubes. When doing this, make sure that you insert the 10-6 that will hold the tube for your bed slats support.
Once the footboard is put together, start building the headboard using the same technique, making sure you remember to add the 10-6 fittings that will later hold the slats support:
The next step is to connect the footboard and the headboard using the longer pieces of tube. Start adding the tube from one side, working your way through to the other side.
Finally, add the bed slats (purchased at a local DIY store), add the mattress, and your bed is ready!
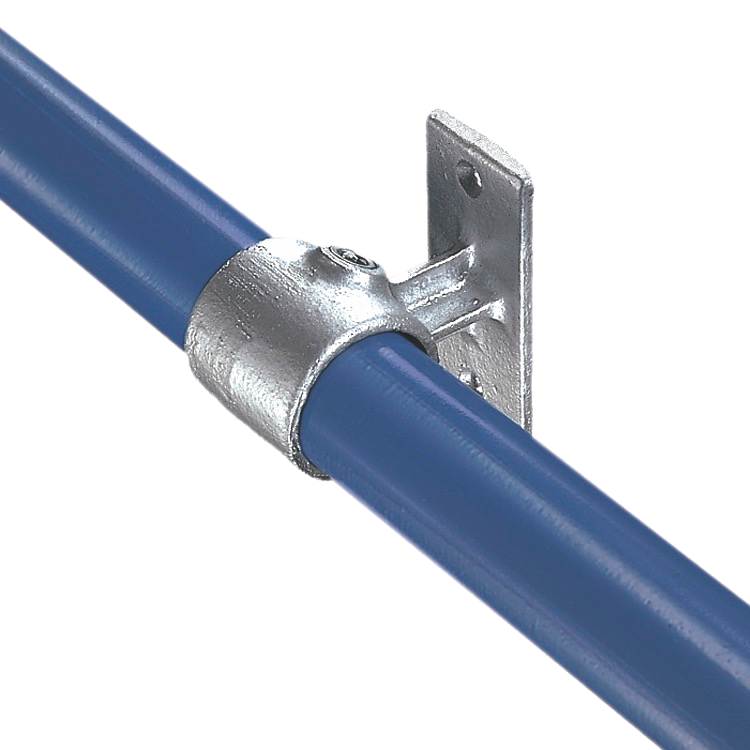
Alternatively, here are a few fittings you can request separately to help you out:
For this ‘Fish Camp’ family retreat project, architect Ignacio Salas-Humara used cedar, stone, concrete, and galvanized pipe as main materials. But out of everything, we were most impressed with how he used Kee Klamp fittings and tubes throughout the property.
Here are 7 projects that he built using tube and fittings:
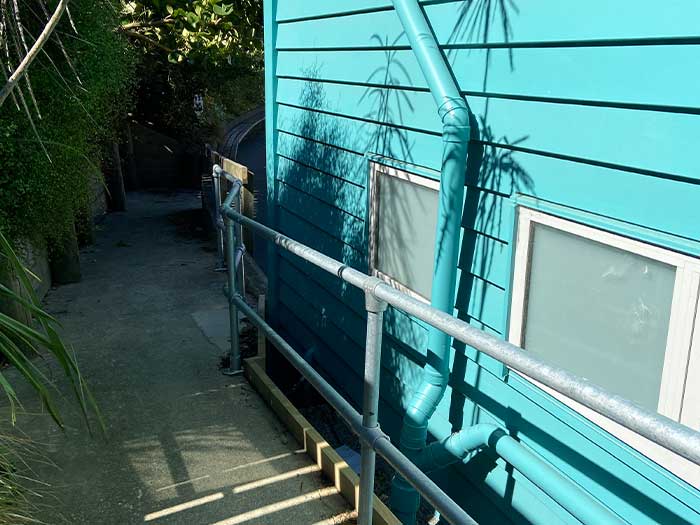
1. Handrails for the entrance stairs
Ignacio chose pipe railings and Kee Klamp fittings for the entrance stairs. These are easy to install and do not require any welding, which makes this a quick, safe, and very durable option.
Galvanised steel is also resistant to any kind of weather, therefore it is highly unlikely that you will need to replace the handrails anytime soon.
2. Railing for the terrace
To give the retreat a consistent look, Ignacio also used tube and fittings to build the railing for the terrace.
Handrails are a very good safety option for any elevated spaces, whether indoors or outdoors; these will help diminish the risk of accidents.
For ease of building, we recommend you use pre-assembled handrail posts, but you can build a handrail from scratch using Kee Klamp and tube just as easily.
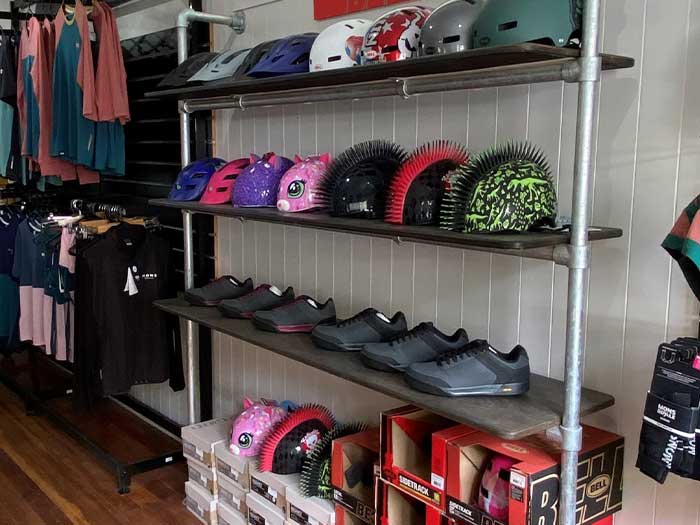
3. Shelf support
Ignacio used Swivel flanges for the interior shelves, to keep the ‘camp-style’ look throughout the property. These are a good idea if you need to attach angled tube to a flat surface (however, don’t use these as a base for guardrails or balustrades).
Ignacio used pipe and fittings to create this lighting support bar. These complement the industrial and agricultural light fixtures that he chose for the house, and go well with the stained pine ceiling.
He decided to adapt some of these to suit his store located at the historic Dudley’s Cottage in Arrowtown.
We were fortunate enough to go and visit the shop to see some of their great display and furniture applications using our SelectFit pipe fittings.
Floor to ceiling TV mounts and shelf
Shelving framing bolted to the wall and floor, using double sided fixing brackets to support shelves
K frame for reception counter
If you’re in the Arrowtown area and keen to hire bikes, get in touch with the friendly team at Better By Bike. They also have a great new location in Queenstown!
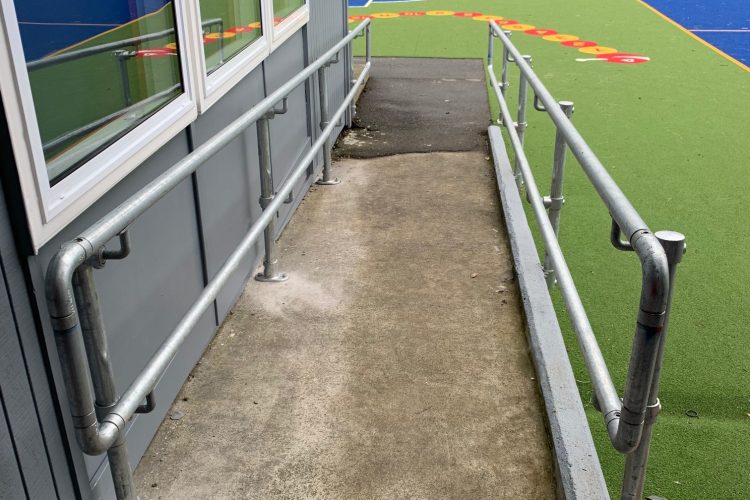
Another great handrail installation for Wellington school!
BMF is proud to supply Kee Klamp & Kee Access products for accessibility upgrades at schools across Aotearoa. Here are some photos from another recent installation in the Wellington region! (Click on the image to enlarge)
DIY Camden bed frame is easy to put together, super sturdy and looks fantastic. Two people are required to build this one, and it can be done using just an Allen key.
Materials: Galvanised steel tube and Kee Klamp fittings
Finish: Galvanised steel (not coloured)
A king size bed you can put together in less than an hour.
Like the idea of an industrial look for your bedroom? This DIY bed frame is a great way to achieve a minimalist and industrial look!
King size bed dimensions:
Length: 200 cm
Width: 150 cm
Headboard height: 120 cm
Footboard height: 80 cm
For this project you’ll need
Kee Klamp fittings, in size 6, made of galvanised steel
Galvanised steel tube, in size 6
Bed slats (need to be purchased separately)
Start assembling the footboard first, using 10-6 and 15-6 fittings to connect the tubes. When doing this, make sure that you insert the 10-6 that will hold the tube for your bed slats support.
Once the footboard is put together, start building the headboard using the same technique, making sure you remember to add the 10-6 fittings that will later hold the slats support:
The next step is to connect the footboard and the headboard using the longer pieces of tube. Start adding the tube from one side, working your way through to the other side.
Finally, add the bed slats (purchased at a local DIY store), add the mattress, and your bed is ready!
Alternatively, here are a few fittings you can request separately to help you out:
Are you looking to build a table frame but not sure how to attach the top to the rest of the structure? We give you four ideas of how you can do that using Kee Klamp fittings and galvanised steel tubes.
You can fix the table top to the flanges using screws. The diameter of the fixing hole for a size 7 flange is 6.5mm. Find more technical details on each fitting in our Kee Klamp catalogue.
Method 2: Sheeting clips
Sheeting clips are a good, cost-effective method of attaching your top to a Kee Klamp table frame.
This means that your table top will sit within the table frame, instead of on top of it. With this method, there is no need to drill into the table top or use any kind of screws, which makes it ideal for hard, heavy materials such as marble, concrete, quartz, ceramic, granite or metal. Used correctly, the M50 fittings are strong enough to hold the weight of any table top.
Here’s an example of a table built using a concrete table top that sits on top of 4 x M50 fittings:
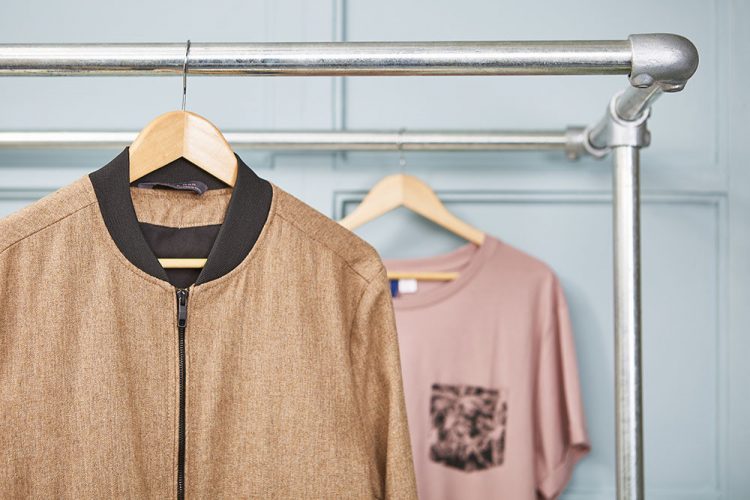
Other structures, such as this clothing rack with a shelf, use M50 fittings to support shelves:
Method 4: Use rail supports for a cool look
Using 70 type fittings will give your table frame an interesting look.
Here is an example of a living room table that uses rail support fittings to hold the glass table top:
TYPES OF TABLE TOPS
1. Wood: How do I attach a wooden table top to a steel frame?
Wooden table tops can be fixed to a Kee Klamp steel or aluminium frame using any of the methods listed above.
Here are a few suggestions:
Do you want to drill into the table top or use screws? If the answer is yes, then build the table frame using flanges (method 1) or sheeting clips (method 2). If the answer is no, go for method 3.
Is the wooden table top very heavy? If the answer is yes, go for method 3. Make sure that the table frame is sturdy enough to hold the top – we suggest building the frame using our Rugged kit.
Do you need the wood plank to sit on top of the frame? If yes, go for methods 1, 2 or 4.
Do you need the plank to sit between the tube that forms the frame? If yes, go for method 3. This will give your table a recessed look.
2. Glass: How to attach a glass table top without screws
Glass table tops can be easily damaged if they are not fitted properly. They will need support in various places and we recommend using methods 1 or 4 to do so.
Here are a few examples:
Additionally, glass table tops will require neoprene gaskets to protect the glass and avoid it slipping.
3. Concrete, marble, quartz, granite, metal, ceramic: How do I mount a heavy table top to a metal frame?
Heavy table tops are difficult to manoeuvre and require good support. We recommend using the Rugged table frame kit as it will give you a good, industrial strength support for any kind of tops (whereas these are made of marble, quarts, concrete, granite etc).
Use method 3 to attach a top like this to the frame. Typically, it is difficult to drill into heavy materials, therefore we recommend going for a recessed look, using M50 type fittings. The top will be supported by these strong single swivel socket members.
Customers have also attached heavy table tops to the frame using flanges (method 1) or sheeting clips (method 2) as well, but this required drilling into the top.
Here are a few examples:
Quartz top
Granite top
4. Plastic: How can I attach a plastic (acrylic) table top to a metal frame?
Plastic can easily be damaged therefore, where possible, avoid drilling through a plastic table top. Bearing this in mind, we recommend a recessed look for your table, using M50 type fittings to support the top.
5. Laminated plywood: Attaching a laminated plywood top to table legs
Laminated plywood can be attached using any of the methods described above. However, if you decide to drill through a laminated table top, do this carefully to avoid damaging the laminated layer.
Case study: BoxBolt expansion bolt used for commuter train line
In 2014, the Oxford-Bicester railway line was renovated and turned into a line capable of accommodating track speeds of up to 100 mph. The renovations also addressed the overall safety of passengers and employees by adding a guardrail system along the track. BoxBolt expansion bolts were used throughout this project.
The guardrail installed along the track is made of Kee Klamp fittings and tube. Due to time restraints and resources it was decided a modular system was the simplest and most cost-effective solution.
Option 1: Using regular bolts to fix the guardrail into steel?
While it is easy to install a Kee Klamp system onto concrete or most other materials, on this occasion the guardrail needed to be attached to an existing steel structure. The workers did not have access to the underside of the steel, and cutting into it would have created unnecessary issues. This meant that using traditional bolts to fix the guardrail into steel was not an option.
Option 2: Why not welding?
Welding the guardrail onto the structural steel was also considered, however, this would have required specialised labour and would have been very costly and time-consuming. Welded structures are also prone to corrosion, which means the longevity of the system would have been automatically diminished.
Option 3: BoxBolt blind bolts did the trick
Box Bolts are bolts that can be used when access is restricted to one side of structural steel, which was the case here. With the help of our BoxSok tool, each BoxBolt can be installed in seconds. BoxSok connects to a common drive, just set your torque and zip the Box Bolts into place.
Here’s a demo of how BoxBolt works:
The finished project
The entire guardrail was installed by the end of 2015, and around 10,000 BoxBolts were used. Whilst this sounds like a daunting task, the installation was simple and straightforward thanks to the use of Kee Klamp and BoxBolts.
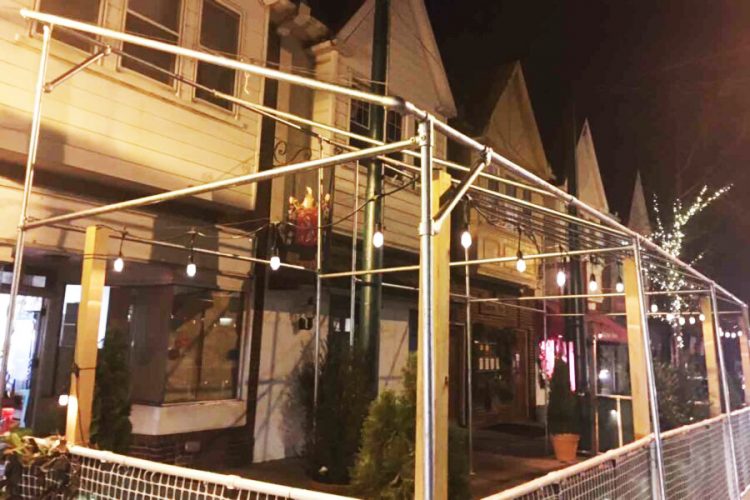
Outdoor Seating and Dining Structure for Restaurants
As the weather will get warmer in a few months, we wanted to share an inspirational design for your outdoor restaurant area or personal dining space to protect you from the rainy (and even snowy) weather and extend your outdoor dining space.
Check out Outdoor Seating and Dining Structure Idea.
BMF is proud to supply Kee Klamp & Kee Access products for accessibility upgrades at schools across Aotearoa. Check out some photos from a recent installation in the Wellington region! (Click on the image to enlarge)
Retail furniture comes in many shapes and sizes and can either complement your products or, if poorly chosen, completely work against your brand. You need to create a good balance between storing your merchandise efficiently, displaying it in an enticing way and leading shoppers around your store.
Our industrial style clothing racks and rails are incredibly sturdy, making them perfect for use at home or in your shop or boutique. Display or store your clothes using our freestanding or wall mounted clothes rail kits. Made of Kee Klamp fittings and galvanised steel tube for extra durability.
Check out 12 Kee Klamp clothes rail ideas for your shop.